How to Clean a Dog's Ears: A Step-by-Step Guide for Pet Owners
- 1. Why Cleaning Your Dog’s Ears Is Important
- 2. Signs Your Dog Needs Ear Cleaning
- 3. How to Clean a Dog’s Ears: Step-by-Step Instructions
- 4. Ear Care Tips for Dogs
- 5. When to See a Veterinarian About Your Dog’s Ears
- 6. Recommended Products for Dog Ear Cleaning
1. Why Cleaning Your Dog’s Ears Is Important
Regular ear cleaning is an essential part of pet care, yet many dog owners overlook it. Dirty ears can lead to discomfort, ear infections, and even hearing problems if not managed properly. Ear cleaning not only helps maintain hygiene but also prevents painful conditions like otitis externa, a common ear infection in dogs.
In addition to preventing infections, cleaning your dog’s ears allows you to spot early signs of problems such as wax buildup, inflammation, or parasites. Routine ear checks can help you catch issues before they escalate into serious health concerns.
2. Signs Your Dog Needs Ear Cleaning
Not all dogs need frequent ear cleaning, but some dogs are more prone to ear issues. Here are a few signs that indicate it’s time for an ear cleaning:
- Excessive scratching or rubbing of the ears: Dogs may scratch or rub their ears due to discomfort caused by wax buildup or infections.
- Odor from the ears: A foul smell often indicates infection or excessive wax buildup.
- Red or swollen ears: If your dog’s ears look red or swollen, this could be a sign of inflammation or infection.
- Discharge or wax buildup: Any unusual discharge or buildup in the ears should prompt a cleaning.
- Shaking the head frequently: If your dog is shaking their head more than usual, it could indicate discomfort or an ear problem.
Pay attention to these signs to determine if it's time to clean your dog’s ears. Regular checks can prevent minor issues from turning into major health concerns.
3. How to Clean a Dog’s Ears: Step-by-Step Instructions
Cleaning your dog’s ears at home can be done safely with a few simple steps. Here’s how to clean a dog’s ears properly:
- Gather the supplies: You'll need cotton balls or gauze pads, ear cleaner recommended by your veterinarian, and some treats to reward your dog after the cleaning.
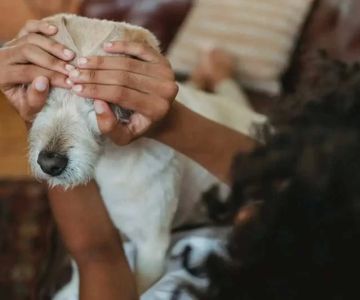
- Prepare your dog: Start by gently holding your dog in place. It's important to keep them calm. You can have someone help you or use a towel to wrap them securely if needed.
- Inspect the ears: Check for any visible dirt, redness, or discharge. If you notice any severe swelling or signs of infection, it’s best to visit your vet first.
- Apply ear cleaner: Squeeze the recommended ear cleaning solution into your dog’s ear canal. Don’t insert the nozzle too deep into the ear.
- Massage the base of the ear: Gently massage the base of the ear to help the cleaner reach deeper into the canal. You’ll hear a squishing sound if you’re doing it right.
- Wipe the ear: Use a cotton ball or gauze pad to wipe the inside of the ear flap and remove any dirt, wax, or cleaner. Avoid using cotton swabs as they can push debris further into the ear.
- Reward your dog: Give your dog a treat after the cleaning to make the experience more positive for them.
Repeat this process for both ears, and ensure your dog’s ears are completely dry before finishing. If your dog is very sensitive or has a history of ear problems, consult with your veterinarian before cleaning at home.
4. Ear Care Tips for Dogs
Proper ear care goes beyond just cleaning. Here are some tips to keep your dog’s ears healthy:
- Keep ears dry: Moisture can lead to infections, especially in dogs with floppy ears. After baths or swimming, dry your dog’s ears thoroughly.
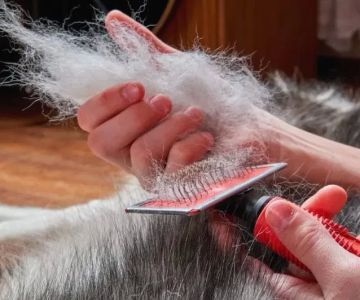
- Trim hair around the ears: Long hair in and around the ear canal can trap moisture and debris. Regular grooming can help prevent issues.
- Use ear-safe cleaning products: Always use ear cleaning solutions specifically designed for pets, as human ear drops can cause harm to your dog’s sensitive ears.
- Monitor ear health regularly: Make it a habit to check your dog’s ears during grooming sessions to detect any early signs of problems.
By following these tips, you can ensure your dog’s ears stay clean and healthy, reducing the likelihood of infections and discomfort.
5. When to See a Veterinarian About Your Dog’s Ears
While regular ear cleaning is important, there are times when a veterinarian should be consulted:
- Severe redness or swelling: If your dog’s ears appear excessively swollen or red, it may indicate a more serious infection.
- Persistent odor: If your dog’s ears have a strong, foul odor that doesn’t go away after cleaning, it could be a sign of an infection.
- Discharge or bleeding: Any abnormal discharge, especially if it's brown, green, or bloody, should be checked by a vet.
- Frequent head shaking or discomfort: If your dog is constantly shaking their head or showing signs of pain, a vet visit is recommended.
Taking action early can prevent more serious ear issues and ensure your dog’s comfort.
6. Recommended Products for Dog Ear Cleaning
If you’re looking for reliable ear cleaning products for your dog, we recommend the following:
- Ear Cleaner Solution: Use a veterinarian-approved ear cleaner like Virbac EpiOtic or Pet MD Ear Cleaner for Dogs.
- Cotton Balls or Gauze Pads: These are gentle and effective for cleaning your dog’s ears without causing damage.
- Ear Drying Powder: If your dog is prone to moisture buildup, consider using an ear drying powder after cleaning to help keep their ears dry and healthy.
Visit Hidden Brook Veterinary for more recommendations on quality ear care products and expert advice on how to keep your dog’s ears in top condition.