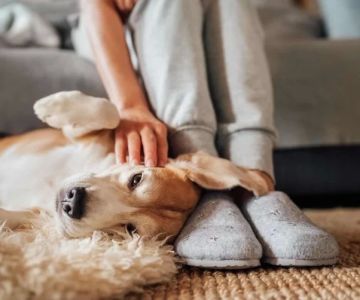
- 1 - Introduction: Importance of Dog Ear Health
- 2 - Why Cleaning Your Dog’s Ears is Essential
- 3 - Essential Supplies for Cleaning Your Dog’s Ears
- 4 - Step-by-Step Guide to Cleaning Your Dog’s Ears
- 5 - Common Mistakes to Avoid When Cleaning Your Dog’s Ears
- 6 - When to Seek Veterinary Help for Your Dog’s Ears
- 7 - Conclusion: Maintaining Your Dog’s Ear Health at Home
1 - Introduction: Importance of Dog Ear Health
As a pet owner, ensuring the health and well-being of your dog is a top priority. While you might focus on their diet, exercise, and general grooming, one area that often gets overlooked is their ears. Dogs' ears are sensitive and prone to infections, particularly if not maintained properly. In fact, ear problems are among the most common veterinary issues dogs face, especially for breeds with floppy ears or those prone to allergies.
Learning how to safely clean your dog’s ears is a vital part of their overall health care routine. Proper ear cleaning can help prevent infections, discomfort, and even hearing loss. In this article, we’ll guide you through the process of cleaning your dog’s ears safely, what you need to avoid, and when to seek professional help from a vet.

10645 N Tatum Blvd ste 200 454, Phoenix, AZ 85028, USA
See Details2 - Why Cleaning Your Dog’s Ears is Essential
Dogs' ears are an essential part of their anatomy and play a crucial role in their ability to hear and maintain balance. However, they can also become a breeding ground for bacteria, yeast, and other microorganisms if not kept clean. Failing to clean your dog’s ears regularly can lead to various issues, including ear infections, discomfort, and even long-term damage to their hearing.

1. Prevent Ear Infections
Ear infections are common in dogs, especially those with long or floppy ears. These dogs are more susceptible to moisture buildup and trapped dirt, creating an environment that fosters bacterial and yeast growth. Regular ear cleaning helps to remove debris and prevent the onset of infections.
2. Combat Allergies
Allergies can cause inflammation in your dog’s ears, leading to discomfort and ear infections. Cleaning their ears helps to reduce allergens and debris that can irritate the ear canal, providing some relief from allergy symptoms.
3. Avoid Ear Odors
Just like infections, ear odors are a common sign of unclean ears. A strong odor from your dog’s ears could indicate a buildup of wax, bacteria, or yeast. Regular cleaning will help reduce any unpleasant smells and maintain their overall ear hygiene.
3 - Essential Supplies for Cleaning Your Dog’s Ears
Before you begin cleaning your dog’s ears, it’s important to gather the right supplies. Having the proper tools will make the process smoother, safer, and more effective. Here are the essential items you’ll need:
1. Dog-Specific Ear Cleaning Solution
Never use human ear cleaners or homemade solutions, as they may irritate your dog’s ears. Instead, purchase a vet-approved ear cleaning solution that is specifically formulated for dogs. These solutions are gentle and help to dissolve wax and debris without causing harm to the delicate skin inside their ears.
2. Cotton Balls or Gauze Pads
Use soft cotton balls or gauze pads to gently wipe out the dirt and debris. Avoid using cotton swabs or Q-tips, as they can push dirt deeper into the ear canal, potentially causing damage or injury.
3. Towels
Keep a towel handy to catch any excess fluid or wax that might come out of your dog’s ear during cleaning. It can also be helpful in gently drying their ears after cleaning to prevent moisture buildup.
4. Treats for Positive Reinforcement
Since cleaning your dog’s ears may not be the most enjoyable activity for them, have some treats ready to reward your pet for cooperating. Positive reinforcement will help them associate ear cleaning with a pleasant experience.
4 - Step-by-Step Guide to Cleaning Your Dog’s Ears
Now that you have the necessary supplies, here’s a step-by-step guide to cleaning your dog’s ears safely and effectively:
1. Prepare Your Dog
Start by ensuring your dog is calm and relaxed. You can either do this by giving them a treat or playing with them for a while before starting the ear cleaning process. If your dog is particularly nervous, consider having someone else help you hold them still during the process.
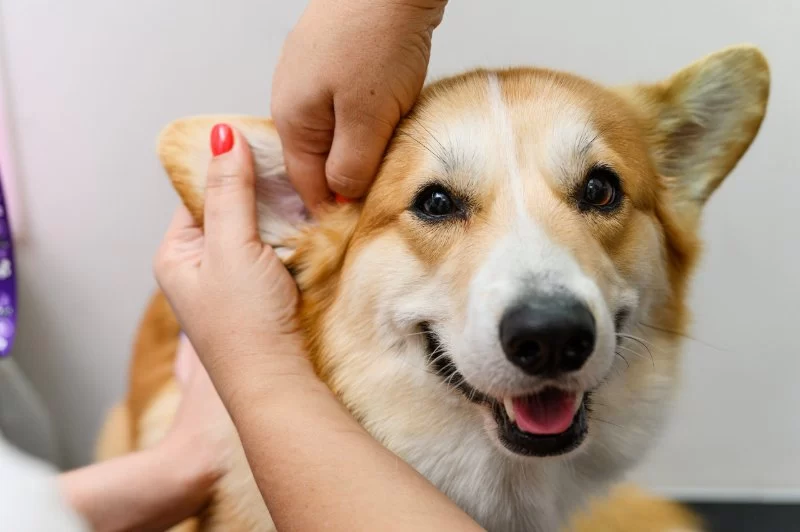
2. Apply the Ear Cleaning Solution
Gently lift your dog’s ear flap and apply a few drops of the ear cleaning solution into the ear canal. Be sure to follow the instructions on the ear cleaner packaging for proper usage.
3. Massage the Base of the Ear
Once the solution is in, gently massage the base of the ear to help loosen any wax and debris. You should hear a squishing sound, which means the cleaner is doing its job.
4. Wipe Away Debris
Use a cotton ball or gauze pad to gently wipe away the loosened dirt and wax from the outer ear and the ear canal opening. Be sure to wipe thoroughly but avoid inserting the cotton into the ear canal. Do not use Q-tips inside the ear as it can cause damage.
5. Dry the Ear
Use a dry cotton ball or gauze pad to wipe away any remaining moisture in your dog’s ear. Keeping the ear dry is crucial in preventing infections caused by moisture buildup.
6. Reward Your Dog
Once you're finished, reward your dog with a treat or some extra playtime. Positive reinforcement will help your dog learn that ear cleaning is a good experience.
5 - Common Mistakes to Avoid When Cleaning Your Dog’s Ears
While cleaning your dog’s ears is a straightforward process, it’s important to avoid a few common mistakes that could lead to injury or irritation.
1. Inserting Cotton Swabs Too Deep
As mentioned earlier, using cotton swabs or Q-tips can push debris deeper into the ear canal. This can lead to blockages, ear infections, and even injury to the eardrum. Always stick to wiping the outer ear and the ear canal opening.
2. Over-Cleaning
Over-cleaning your dog’s ears can irritate the sensitive skin inside the ear canal. Clean their ears only when necessary—usually once a week or as recommended by your vet—unless your dog has an ear infection that requires more frequent cleaning.
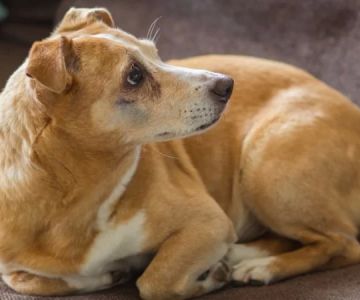
3. Ignoring Signs of Infection
If your dog’s ears are red, swollen, or have a foul odor, it could be a sign of an ear infection. In such cases, it’s best to consult with your veterinarian rather than attempting to clean their ears yourself.
6 - When to Seek Veterinary Help for Your Dog’s Ears
While cleaning your dog’s ears at home is important, there are times when it’s necessary to seek professional help. If your dog exhibits any of the following symptoms, contact your veterinarian immediately:
1. Persistent Odor or Discharge
If your dog’s ears have a persistent odor, or if there is a thick, yellow, or bloody discharge, this could indicate an ear infection or other serious condition. Don’t wait—get your dog checked by a vet as soon as possible.
2. Excessive Scratching or Shaking of the Head
If your dog is excessively scratching their ears or shaking their head, this could indicate pain or irritation in their ears. It’s essential to have a vet examine their ears to identify the cause.
3. Swelling or Redness
Swelling or redness inside your dog’s ears can be a sign of an infection, inflammation, or an allergic reaction. A veterinarian can help diagnose the problem and recommend appropriate treatment.
7 - Conclusion: Maintaining Your Dog’s Ear Health at Home
Maintaining your dog’s ear health through regular cleaning is an important part of their overall care. By following the vet-approved tips and avoiding common mistakes, you can help prevent infections and discomfort in your pet’s ears.
If you’re unsure about the ear cleaning process or notice any signs of infection, don’t hesitate to reach out to a professional like Hidden Brook Veterinary for expert guidance and support. With the right care, your dog can enjoy healthy, infection-free ears for years to come.