The Best Ways to Clean Your Cat's Litter Box: A Complete Guide for Cat Owners
As a cat owner, one of the essential tasks you'll need to perform regularly is cleaning your cat's litter box. Not only is it important for maintaining a healthy and clean environment for your cat, but it also helps in preventing unpleasant odors from taking over your home. Over the years, I’ve tried various methods, and today, I’m going to share the best practices for cleaning your cat's litter box in a way that's easy, efficient, and effective. This guide will help ensure your cat's bathroom is kept fresh and hygienic for both your feline friend and your home.

1. Choose the Right Litter Box for Your Cat
The first step to maintaining a clean litter box is selecting the right one. Cats can be quite particular about their bathroom habits, so it’s important to provide them with a litter box that suits their preferences. Some cats prefer a covered box, while others prefer an open one. Personally, I've found that a spacious, uncovered litter box works best for my cat because it allows her more freedom of movement and lessens the chance of her feeling confined. It's also easier to clean an open box.
Additionally, the size of the litter box matters. It should be large enough for your cat to comfortably turn around in. A general rule is that the box should be one and a half times the size of your cat. If you have multiple cats, I recommend having at least one box per cat, plus an additional one to avoid territorial issues.

2. Scoop Daily to Keep Things Fresh
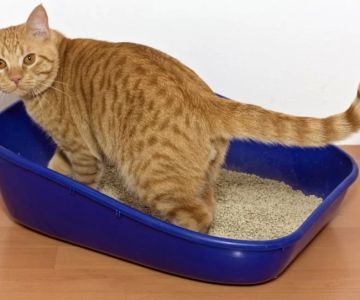
Daily scooping is one of the most important aspects of keeping your cat’s litter box clean. I make it a point to scoop my cat’s box once a day, typically in the morning or evening. By removing waste daily, you prevent odors from building up and keep the litter fresh for your cat to use. This also helps avoid the growth of bacteria and reduces the chance of urinary tract infections, which are common in cats that use dirty litter boxes.
If you’re using clumping cat litter, it’s even easier to scoop because the litter will form solid clumps around the waste, which are easier to remove. If you’re using non-clumping litter, you may need to stir it more thoroughly to mix the waste evenly and maintain a clean surface.
3. Empty and Replace the Litter Regularly
Even with daily scooping, it’s necessary to completely replace the litter every couple of weeks. I typically replace the litter once every two weeks, although you may need to do this more frequently if you have multiple cats or use a non-clumping litter. When replacing the litter, be sure to thoroughly clean the litter box with warm water and mild soap to remove any lingering bacteria or odors.
As for the type of litter to use, I’ve tried both clumping and non-clumping types. Clumping litter works best for me because it makes the cleaning process much easier, and it’s more efficient at absorbing odors. There are also eco-friendly options available, like recycled paper or wood pellets, that are both safe for your cat and better for the environment.
4. Use Liner Bags for Convenience
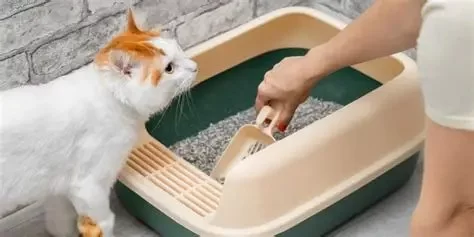
To make the cleaning process quicker and more convenient, I recommend using liner bags in your litter box. Liner bags allow you to simply lift the bag out, making it easier to dispose of used litter. If you’re not keen on using liners, you can still manage cleaning by using a small shovel to remove waste and manually disposing of it.
One thing I’ve learned is that using a liner helps prevent the litter box from getting scratched or stained. It also makes it easier to clean the box, as you don’t have to scrub the sides as much. Simply removing the liner bag and replacing it with a new one keeps everything neat and tidy.
5. Keep the Litter Box in a Quiet, Accessible Spot
Where you place the litter box is just as important as how you clean it. Cats are sensitive to their surroundings, so placing the litter box in a quiet, low-traffic area of the home ensures your cat feels safe and comfortable using it. I’ve found that placing the litter box in a bathroom or laundry room works well because it’s an out-of-the-way space with enough ventilation. Avoid putting the box near your cat’s food or water dishes, as cats don’t like to associate their eating area with their bathroom area.
6. Freshen Up with Litter Box Deodorizers
If you're dealing with persistent odors, consider using a litter box deodorizer. I’ve tried both sprays and powders designed to reduce odors, and they work effectively. Be sure to choose a product that’s safe for your cat, as some chemical deodorizers can irritate their sensitive noses. Baking soda is another natural option that I’ve used to control odors. Sprinkling a small amount of baking soda on top of the litter before adding fresh litter can help absorb smells throughout the day.
7. Monitor for Health Issues
Cleaning your cat’s litter box regularly not only helps maintain a clean environment, but it also gives you the chance to monitor your cat’s health. Changes in your cat’s waste can be an early warning sign of health issues, such as urinary tract infections, kidney problems, or digestive issues. If you notice changes in the color, consistency, or frequency of your cat’s urine or feces, consult your veterinarian right away.
In my case, I noticed that my cat started using the litter box more frequently, which prompted me to check with her vet. Thankfully, it was just stress from a recent move, but it was a good reminder that regular cleaning allows you to notice any health changes in your pet early.
By following these simple steps, you can ensure that your cat's litter box stays clean, fresh, and hygienic. A clean litter box contributes to a healthy living environment for your cat, and it's one of the easiest ways to show your cat love and care.
For more information on cat care or to explore the best products for your pet, be sure to check out Hidden Brook Veterinary for all your pet’s needs.